Salesforce canvas Python app in Heroku
In this post I’ll explain how to build a basic Salesforce canvas application using Flask running on Heroku (pretty much the content of my presentation but SEO friendly).
Origin
On DF’13 I gave a presentation about how to create Salesforce canvas applications in Python (slides). I usually like to code external implementations using either Python, Ruby or NodeJS.
The canvas App Previewer only has templates to create Ruby and Java versions in Heroku, so I though it would be a nice contribution to the community if I coded a Python example.
Heroku
Heroku charges per time and based on Dynos that are containers running commands in a system. They provide free of charge use of 1 Dyno when you create an app.
To start with the Salesforce canvas Python implementation we need an account in Heroku. After we got an account it’s a good idea to install their toolbelt to be able to interact with Heroku from command line.
Creating an app
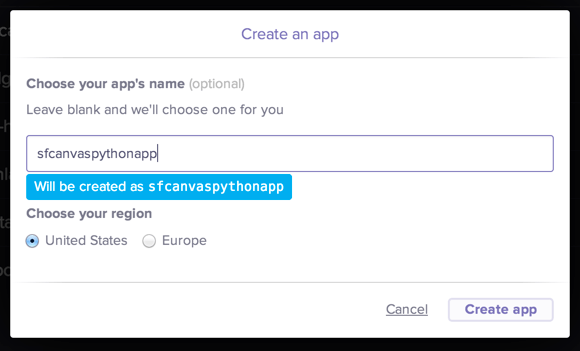
An app in Heroku can be created using command line or through the web UI. Let’s do it using the UI:
When the app is created this message is displayed providing more instructions to checkout the git repo on our workstation:
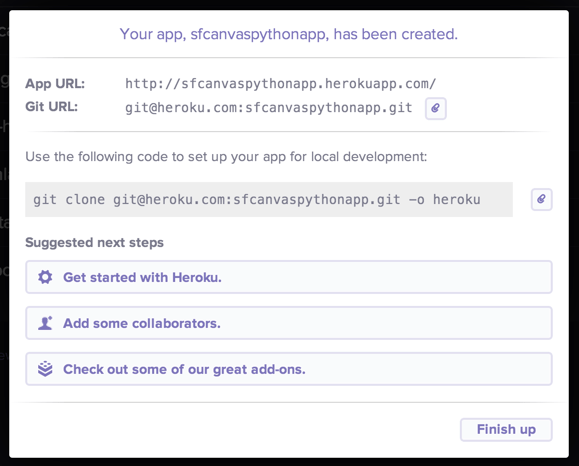
Running the following command will create a directory called sfcanvaspythonapp with the contents of our Heroku app (empty at the beginning), and a remote called Heroku.
$ git clone git@heroku.com:sfcanvaspythonapp.git -o HerokuPython application
Now that we got the Heroku app created, it’s time to start coding our app in Python!
To work with Python libraries we need a Python Package manager lile PIP.
Virtualenv
We need to create a virtual environment in the directory that contains our Python app.
Virtualenv is an isolated Python environment. Allows you to control which packages are used on a particular project by cloning your main Python. Virtualenv can be installed using the script provided on the page or using system package managers (like homebrew in OSX or apt-get in Ubuntu).
To create a virtual environment we need to run this inside of our previously created Heroku app directory:
$ virtualenv --distribute venvThat will create a copy of our Python interpreter from the system to a folder called venv.
To activate this environment, we need to execute:
$ source venv/bin/activateTo avoid this virtual environment to be added to our git repo we need to edit our .gitignore and add venv.
Installing Flask and gunicorn
Installing Flask and gunicorn is pretty easy using pip:
$ pip install Flask gunicornFlask is the web framework and gunicorn the server needed to run that web app in Heroku.
Creating our first Flask app
Let’s create a file called webapp.py with the following content to test our Flask installation:
from flask import Flask
app = Flask(__name__)

@app.route("/")
def hello():
    return "Hello World!"

if __name__ == "__main__":
    app.run()
Then run our python code with:
  $ python webapp.py
  * Running on http://127.0.0.1:5000/
If we head to http://127.0.0.1:5000/ using our browser we will see a “Hello World!”.
So far so good, now let’s add some logic to interact with Salesforce.
Decoding the Signed Request
In order to authenticate, canvas apps can use either OAuth or Signed Request.
Salesforce provides classes to decode the signed request in Ruby and Java along with their quickstart canvas templates.
I’ve ported the Ruby version of that signed request decoder class to Python.
So in order to use this class we need to create a file canvas_signed_request.py with the following content:
import base64, hashlib, hmac

class SignedRequest(object):

  # Construct a SignedRequest based on the stringified version of it.
  def __init__(self,consumerSecret, signedRequest):
    self.consumerSecret = consumerSecret
    self.signedRequest = signedRequest

  # Validates the signed request by verifying the key, then returns
  # the json string.
  def verifyAndDecode(self):

    # Validate secret and signed request string.
    assert self.consumerSecret != None,'No consumer secret found in environment [CANVAS_CONSUMER_SECRET].'
    assert self.signedRequest != None, 'Signed request parameter required.'

    # 1) Split the signed request into signature and payload.
    request_array = self.signedRequest.split('.')

    assert len(request_array) == 2, 'Incorrectly formatted signed request.'

    signature = request_array[0]
    payload = request_array[1]

    # 2) Verify the contents of the payload by first validating the authenticity
    #    of the signature.
    decodedSignature = base64.b64decode(signature)

    this_hmac = hmac.new(self.consumerSecret,payload,hashlib.sha256)

    assert decodedSignature == this_hmac.digest(), 'Signed request has been tampered with.'

    # 3) Decode the base64 encoded payload of the canvas request.
    jsonString = base64.b64decode(payload)

    return jsonString
Salesforce
Create a connected APP in salesforce
Head to Setup/Create/Apps:
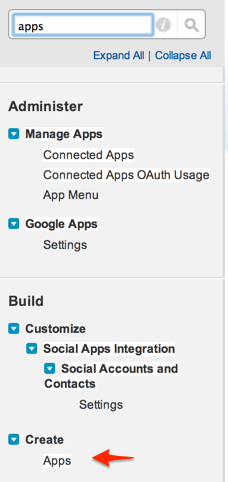
At the bottom of the screen there’s a section called Connected apps click on New:

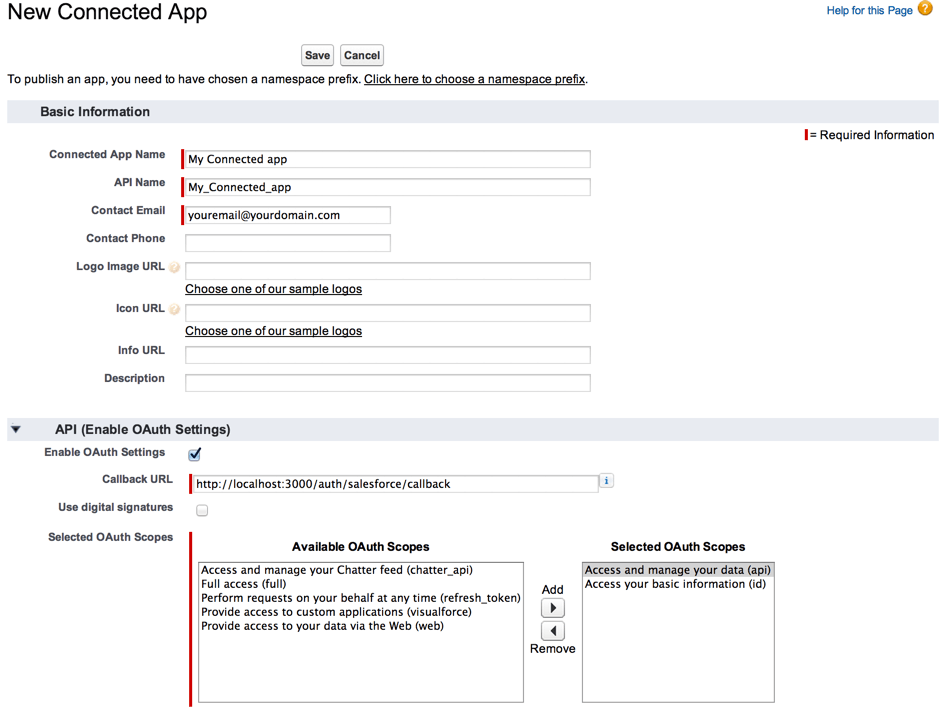
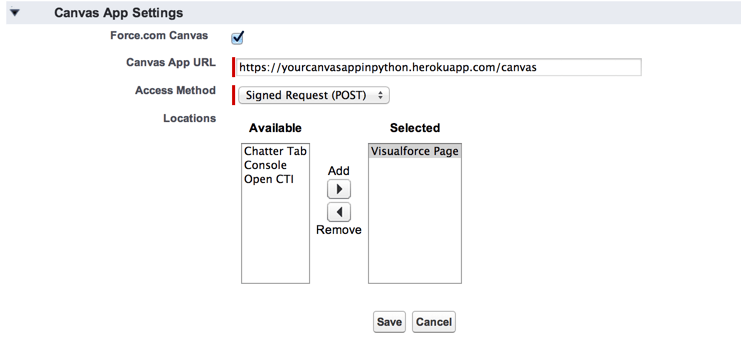
Fill the required fields with information about your app, and check “Enable OAuth Settings”. Please note that the Callback URL field in the OAuth section must be filled because is required, but since we’re using Signed Request, that won’t be used. The reason to use OAuth Settings is to define a Scope (that will be applied when we login using a Signed Request), so the Select OAuth Scopes is relevant and must be set accordingly to our needs.
Set the URL of your Heroku app and where the app will be used. In this example I’m going to display a canvas app in a visualforce page.
After the app is created take note of the “Consumer Key” and “Consumer Secret”. The terminology is from OAuth 1.0 those now are called “Client Id” and “Client Secret”.
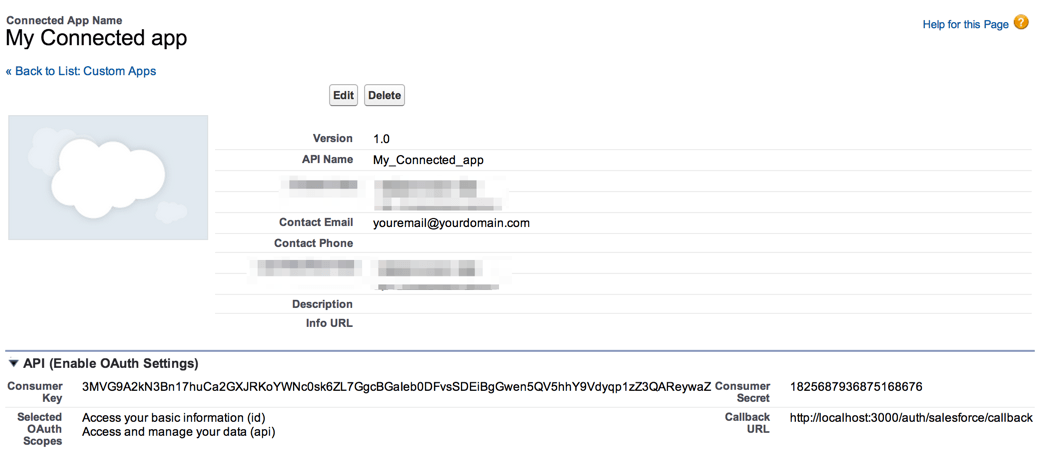
From the app detail we need to click the Edit button to change one OAuth default option in order to use this app with canvas. The default is “All users will self authorize”, must be changed to “Admin approved users are pre-authorized”

Also we need to grant access to this app to profiles , editing them and checking the app name under the section “Connected App Access”
Connecting the dots
Now it’s time to connect our Heroku app with our Salesforce app to see the magic of Salesforce Canvas.
Using Heroku command line we will add our connected app secret to an environment variable called SECRET.
To do so we need to execute the following command from the Heroku app directory in our workstation:
$ Heroku config:set SECRET=<ConnectedAppSecret>After that we are going to modify our webapp.py file:
from flask import Flask, request
from canvas_signed_request import SignedRequest
app = Flask(__name__)
import os

@app.route("/")
def hello():
    return "Hello World!"

## add a new route
@app.route('/canvas', methods=['POST'])
def canvas():
  secret = os.environ.get('SECRET')
  sr_param = request.form['signed_request']
  srHelper = SignedRequest(secret,sr_param)
  canvasRequestJSON = srHelper.verifyAndDecode()
  return canvasRequestJSON

if __name__ == "__main__":
    app.run()
Heroku looks for a Procfile to know what to execute, let’s create a file called Procfile and add the following content:
web: gunicorn webapp:appTo check that everything is looking OK, we can run foreman start (this will emulate what Heroku will do to start the app)
Finally Heroku must know which libraries we had installed in our environment, so we need to save them to a file called requirements.txt.
This can be accomplished with the following command:
$ pip freeze > requirements.txtAnd that’s it. Now we need to store everything and commit to our local repo:
  $ git add .
  $ git commit -m "ready for canvas"
And deploy it to Heroku:
$ git push Heroku masterTrying out your canvas app
Now to try it out, we log in to salesforce and head to Setup / Build / Canvas App Previewer. Our connected app name will be shown on the left hand of the screen, clicking it will display a JSON object. That JSON object is the decoded version of the signed request and contains all the information to interact with Salesforce Javascript SDK.
I’ll not dig deeper into how to use this SDK to keep this post lighter. See the additional projects listed below for more
Additional links
The project I describe in this post:
For a more elaborated Salesforce canvas Python project check out the Super Powered Recycle Bin:
This was the project I’ve created to show in the presentation and explores the use of some of the information contained in the JSON object (the token) to interact with other APIs from Python.
The app is also an example of how the platform functionality can be extended using these tools.
Comments